Welcome to Your Next Step Toward Better Sleep
Discover a simpler, more comfortable way to get answers about your sleep. Ognomy offers five advanced home sleep apnea tests, each designed for convenience, accuracy, and peace of mind.
WatchPat

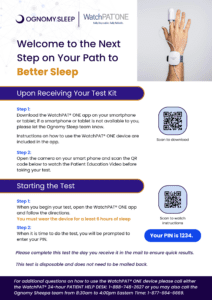
The WatchPAT® is an easy-to-use, FDA-cleared device for home sleep testing. You wear it on your wrist like a watch, with a soft probe on your finger and a small sensor that sticks to your chest. The device tracks important information while you sleep, including your heart rate, blood oxygen levels, breathing patterns, body position, and movements.
All the data is collected overnight and sent to a smartphone app, which quickly shares your results with your doctor. Compared to traditional sleep studies that require a patient to spend a night in a sleep laboratory, WatchPAT is much more convenient and comfortable for patients.
What app do I need to download?
You will need to download the WatchPAT ONE app on your smartphone or tablet. If you do not have one available to you, please let our team know at 1-877-664-6669.
Download for Apple
Download for Google
What is the pin number I need to enter?
Please enter your pin 1234 when you are ready to take your test.
Do I need to mail my test back?
No, this test is disposable and does not need to be shipped back. If you receive any emails about needing to return the test, please reach out to our team at 1-877-664-6669 or support@ognomy.com.
How can I get support when Ognomy Sleep is closed?
Please call the WatchPAT 24 hour patient help desk at 1-888-748-2627
ApneaLink Air
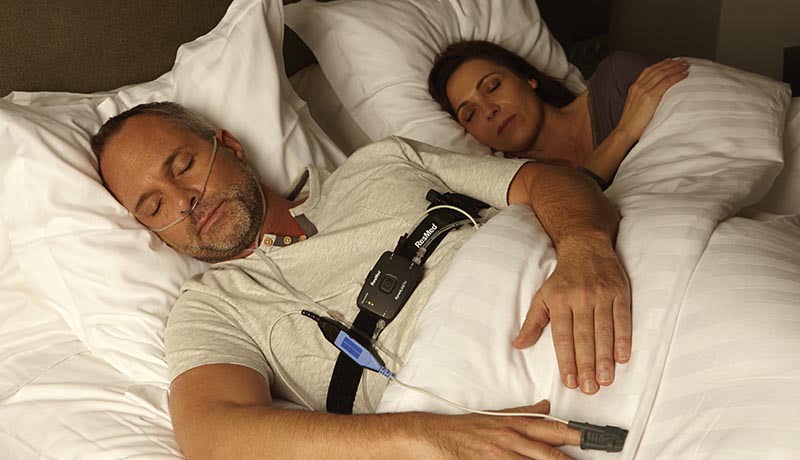
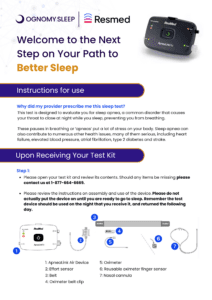
The ApneaLink Air™ is a small, lightweight device designed for easy home sleep testing. You wear it overnight to record important information about your breathing, oxygen levels, heart rate, nasal airflow, and snoring. The device is simple to use, with one-touch start and stop buttons and a light that shows when the test is finished.
What is included in my test kit?

- ApneaLink Air Device
- Effort sensor
- Belt
- Oximeter belt clip
- Oximeter
- Reusable oximeter finger sensor
- Nasal cannula
Do I need to download an app?
No, you do not need to download an app for this sleep test.
Do I need to mail my device back?
Yes, once you have completed your sleep test, please drop off the device at our office 1120 Youngs Rd, Buffalo, NY 14221. If the device was mailed to you, please use the return label provided to send the device back to us. Once we receive the device back, your sleep test will be interpreted.
How can I get support setting up my device?
Please contact our team at 1-877-669-6664 between 8:30am – 4:00pm Eastern Time. If you call after hours, please leave a message with a call back number and we will return your call the following day.
SleepImage
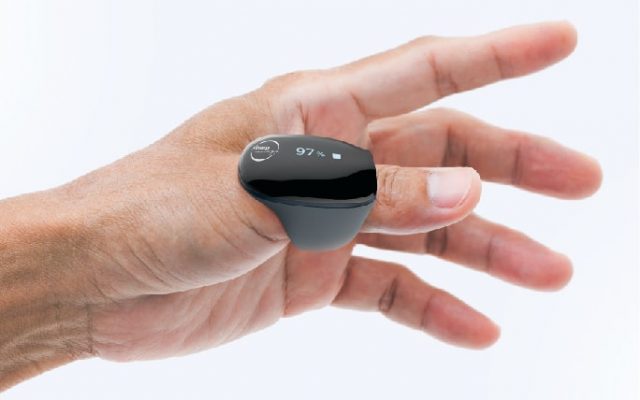
The SleepImage Ring is a small, comfortable device you wear on your finger while you sleep. There are no wires or tubes—just slip the ring on before bed. It tracks important information like your breathing, heart rate, oxygen levels, and movement throughout the night. The ring connects to a smartphone app, which starts and stops the test and sends your data securely to your doctor.
What app do I need to download?
You will need to download the SleepImage® Mobile app on your smartphone or tablet. If you do not have one available to you, please let our team know at 1-877-664-6669.
Download for Apple
Download for Google
How do I use the SleepImage Ring?
Wear the ring on your finger before going to bed and follow the instructions in the app. In the morning, remove the ring. Make sure the ring is worn on the base of your thumb/finger. Use the same finger each night for consistency.
Do I need to return the device?
Yes, please return the device after you finish your test using the prepared label that was sent with your device.
How can I get support setting up my device?
Please contact our team at 1-877-669-6664 between 8:30am – 4:00pm Eastern Time. If you call after hours, please leave a message with a call back number and we will return your call the following day.
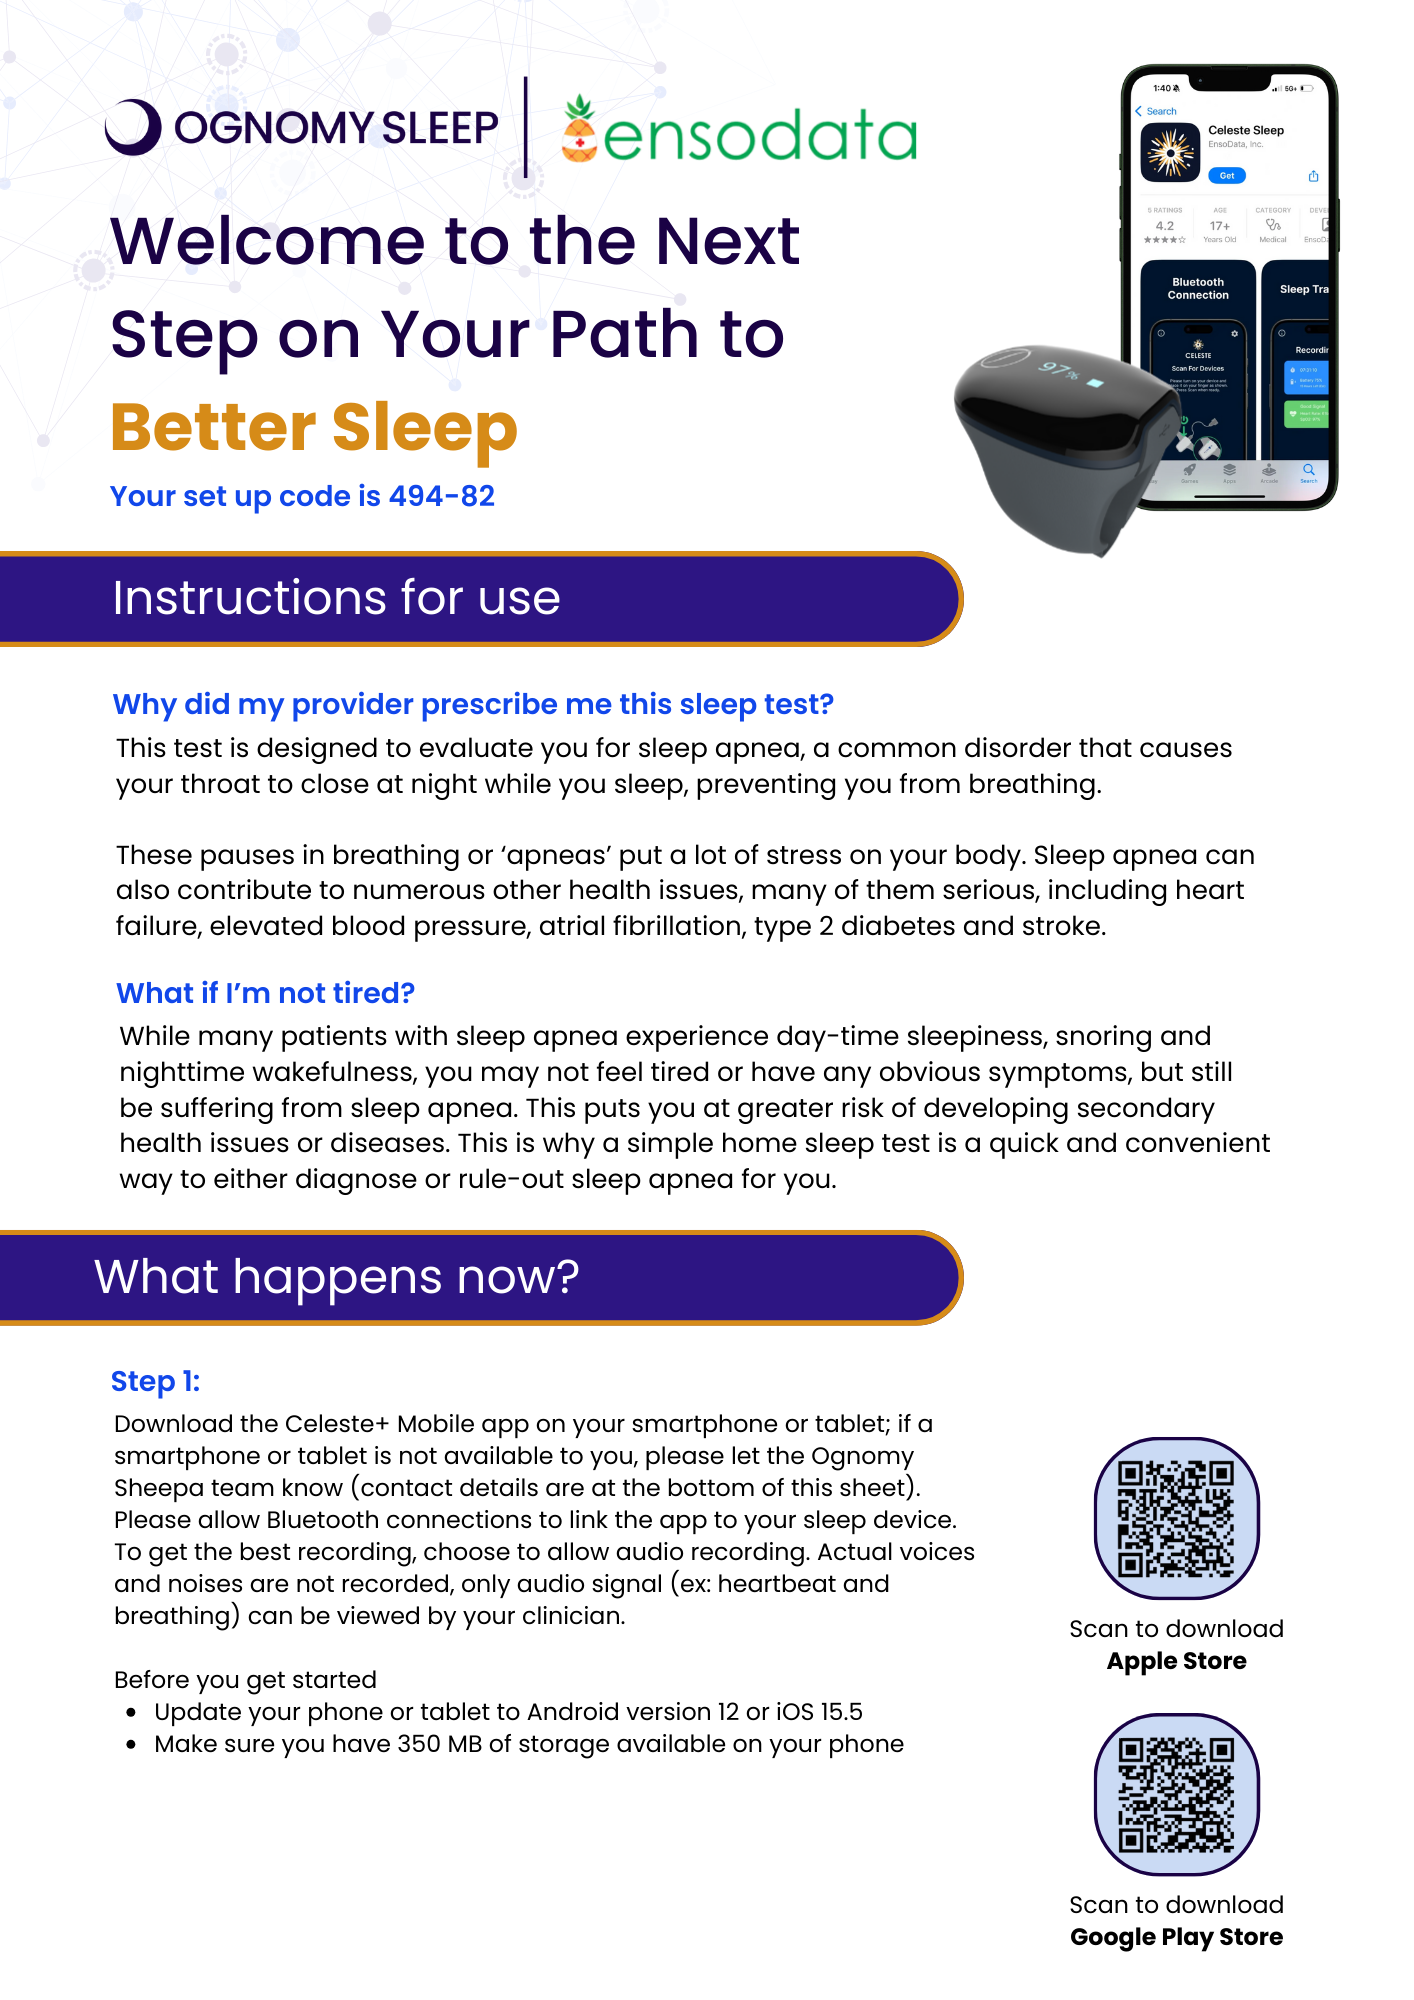
EnsoData
The EnsoData sleep test is an easy-to-use device designed for sleep testing in your own home. You use a small, comfortable oxygen sensor that you put on your wrist and finger, which connects to your smartphone with the Celeste+ app. The test tracks your breathing, oxygen levels, heart rate, movement, snoring, and airflow while you sleep. Put the sensor on your wrist and finger, turn it on, and open and use the Celeste+ app to start the test.
What app do I need to download?
You will need to download the Celeste+ Mobile app. If you do not have a smartphone or tablet available to you, please let our team know at 1-877-664-6669.
Download for Apple
Download for Google
- Update your phone or tablet to Android version 10 or iOS 15.5
- Make sure you have 350 MB of storage available on your phone
What is my setup code?
Your set up code is 494-82
What steps should I take before starting my test?
- Put your phone or tablet near your bed with the microphone facing you (1-2 feet away)
- Remove any distractions and noises. If your partner or pet snores or breathes loudly, it is best if you sleep alone while taking the test.
- Make sure your phone is charged while you are recording during the night. The audio recording uses a lot of power and we don’t want your device to die mid-recording.
Do I need to return the device?
Yes, please return the device after you finish your test using the prepared label that was sent with your device.
How can I get support setting up my device?
Please contact our team at 1-877-669-6664 between 8:30am – 4:00pm Eastern Time. If you call after hours, please leave a message with a call back number and we will return your call the following day.
NightOwl

The NightOwl™ is an easy-to-use device for home sleep testing. You wear a sensor on your finger while you sleep, and it connects wirelessly to the myAir™ by ResMed app on your smartphone or tablet. The NightOwl™ tracks your sleep patterns, breathing, and oxygen levels throughout the night to help your doctor understand your sleep.
How do I get started with NightOwl™?
You’ll receive an email with an activation code and instructions. Download the myAir™ by ResMed app, enter your code, and follow the setup steps.
Download for Apple
Download for Google
How do I wear the NightOwl™ sensor?
Use a new adhesive wrap to attach the sensor to the tip of your index finger. Make sure it’s snug but not too tight.
Can I delete the myAir™ by ResMed app after I finish my test?
We ask that you wait at least 2 weeks before deleting your app to allow for all your results to be read and interpreted.
Why do I get an error message when trying to login?
If you already have an account on the myAir™ by ResMed app for CPAP, you will need to create a new account with a new email address for this test.
Do I need to return the device?
No, complete your one or two night sleep test (as instructed by your sleep specialist), and then hold on to the device if future testing is needed.
How can I get support setting up my device?
Please contact our team at 1-877-669-6664 between 8:30am – 4:00pm Eastern Time. If you call after hours, please leave a message with a call back number and we will return your call the following day.
Contact Information
If you can’t return the device on-time, have any questions, concerns, or a complaint you can contact us at: support@ognomy.com or call 877-664-6669 (live support available 8:30am to 4:00pm ET).
If you need help with your sleep study after hours, send us an email or leave us a voicemail with your contact information, and we will get back to you the next business day. (Note, if your device is a WatchPAT, there is 24/7 support available to you at 1-888-748-2627)
